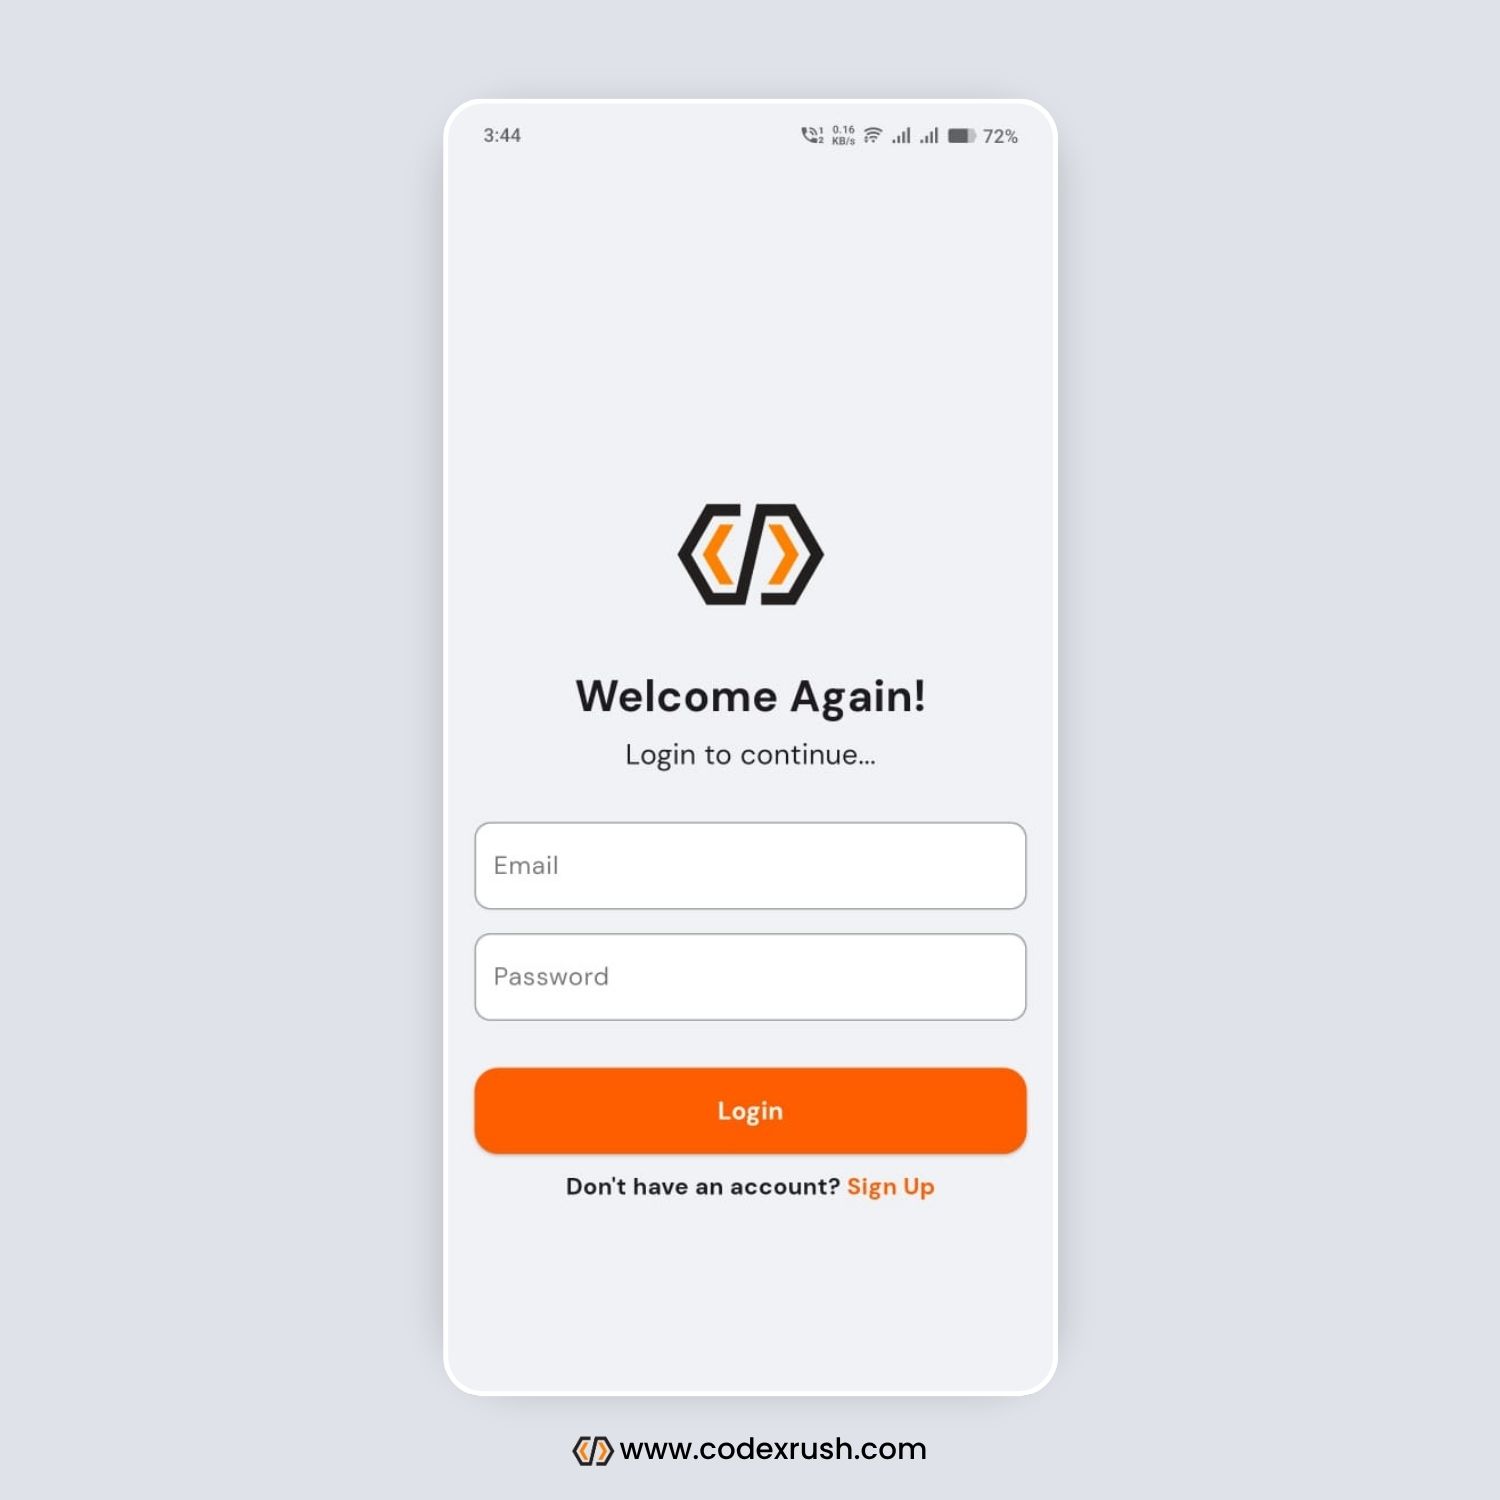
Creating a modern and clean login screen is essential for every Flutter app. In this step-by-step guide, we’ll build a beautiful Flutter login screen UI using TextField, ElevatedButton, and proper theming. This screen is fully responsive, styled, and ready to integrate into any app.
Whether you’re building an ecommerce app, social app, or admin panel, a well-designed login screen builds trust and improves UX.
What You’ll Learn
How to create a full login page layout in Flutter
How to use
TextFieldfor email and passwordStyling with
OutlineInputBorderandElevatedButtonMaking your screen responsive and scrollable
SEO-friendly structure for Flutter blog content
Flutter Login Screen UI Code
					import 'package:flutter/material.dart';
import 'package:fluttertutorials/constants/colors.dart';

class LoginScreen extends StatefulWidget {
  const LoginScreen({super.key});

  @override
  State<LoginScreen> createState() => _LoginScreenState();
}

class _LoginScreenState extends State<LoginScreen> {
  @override
  Widget build(BuildContext context) {
    return Scaffold(
      backgroundColor: Colors.white,
      body: SingleChildScrollView(
        child: Container(
          height: MediaQuery.of(context).size.height,
          padding: EdgeInsets.all(20),
          child: Column(
            mainAxisAlignment: MainAxisAlignment.center,
            children: [
              Image.asset(
                "assets/images/logo.png",
                width: 100,
              ),
              SizedBox(height: 20),
              Text(
                "Welcome Again!",
                style: TextStyle(fontSize: 28, fontWeight: FontWeight.bold),
              ),
              SizedBox(height: 5),
              Text(
                "Login to continue...",
                style: TextStyle(fontSize: 18),
              ),
              SizedBox(height: 30),
              Container(
                decoration: BoxDecoration(
                  color: Colors.white,
                  borderRadius: BorderRadius.circular(15),
                ),
                child: TextField(
                  cursorColor: primaryColor,
                  decoration: InputDecoration(
                      labelText: "Email",
                      labelStyle: TextStyle(color: Colors.black54),
                      enabledBorder: OutlineInputBorder(
                          borderRadius: BorderRadius.circular(10),
                          borderSide: BorderSide(color: Colors.grey, width: 1)),
                      focusedBorder: OutlineInputBorder(
                          borderRadius: BorderRadius.circular(10),
                          borderSide:
                              BorderSide(color: primaryColor, width: 1))),
                ),
              ),
              SizedBox(height: 15),
              Container(
                decoration: BoxDecoration(
                  color: Colors.white,
                  borderRadius: BorderRadius.circular(15),
                ),
                child: TextField(
                  cursorColor: primaryColor,
                  decoration: InputDecoration(
                      labelText: "Password",
                      labelStyle: TextStyle(color: Colors.black54),
                      enabledBorder: OutlineInputBorder(
                          borderRadius: BorderRadius.circular(10),
                          borderSide: BorderSide(color: Colors.grey, width: 1)),
                      focusedBorder: OutlineInputBorder(
                          borderRadius: BorderRadius.circular(10),
                          borderSide:
                              BorderSide(color: primaryColor, width: 1))),
                ),
              ),
              SizedBox(height: 30),
              SizedBox(
                width: double.infinity,
                child: ElevatedButton(
                  onPressed: () {},
                  style: ElevatedButton.styleFrom(
                      foregroundColor: Colors.white,
                      backgroundColor: primaryColor,
                      padding: EdgeInsets.all(16),
                      shape: RoundedRectangleBorder(
                          borderRadius: BorderRadius.circular(15))),
                  child: Text(
                    "Login",
                    style: TextStyle(fontWeight: FontWeight.bold, fontSize: 16),
                  ),
                ),
              ),
              SizedBox(height: 10),
              Row(
                mainAxisAlignment: MainAxisAlignment.center,
                children: [
                  Text(
                    "Don't have an account?",
                    style: TextStyle(fontWeight: FontWeight.bold, fontSize: 15),
                  ),
                  Text(
                    " Sign Up",
                    style: TextStyle(
                        fontWeight: FontWeight.bold,
                        fontSize: 15,
                        color: primaryColor),
                  ),
                ],
              )
            ],
          ),
        ),
      ),
    );
  }
}
Tips for Customization
Replace the logo with your app branding
Add
TextEditingControllerto retrieve inputValidate inputs before allowing login
Connect the login button to your auth logic (e.g., Firebase)
Conclusion
Designing a beautiful login screen in Flutter is quick and easy when you know the layout principles and widget combinations. This tutorial provided a clean and modern design with responsive behavior and complete Dart code.
You can use this as a base for any Flutter app — ecommerce, admin panels, or social apps. Customize the theme, branding, and logic to fit your use case.